TM1 Element holder is a single element in a dimension. This element doesn’t have any parent and children. It is used to hold data only.
Where to use “TM1 Element Holder”?
Case 1: Assume that two dimensions D1 and D2 share the same leaf element and one dimension D1 is used for approval hierarchy.
When opening a node for entering data, we need to decide what element in D2 should be in context filter. It is impossible to fix one element for D2, as logically, we should enter data into the same leaf in D2 as the leaf in D1. “Element Holder” is here to rescue. We can save the data into this holder, then use rule to redistribute data to the leaf level for D2
Case 2: Assume there are two independent dimensions, but it is requested to have built an approval hierarchy with concatenate two dimensions together. For example, sales manager dimension and customer dimension. You want to build approval hierarchy as follows
Sales manager 1
Sales manager 1 – Customer 1
Sales manager 1 – Customer 2
Sales manager 1 – Customer x
There are two options to proceed. The one option is to build two cubes. The one cube is with sales manager, but no customer dimension. Then we can define the second cube, and use TI process to distribute data into second cube with Customer dimension. The second option is to use Element Holder. We don’t need to create the second cube, instead, we can use rule to distribute data into all leafs for customers.
How to Use “TM1 Temporary Element Holder”?
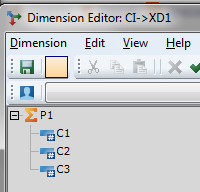
Assume dimension XD1
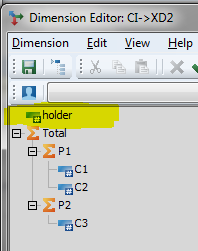
Assume dimension XD2
Put two dimensions into a cube as below; please note that XD2 is specified as holder in Context, you can see clear that P1 = C1+ C2+ C3

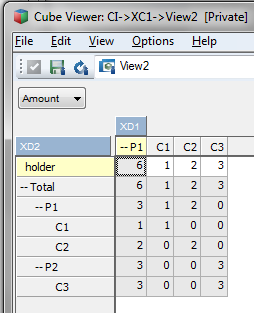
When switch view with both XD1 and XD2, then view looks like follows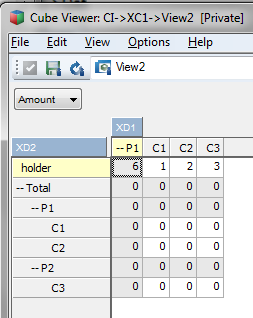
As C1, C2 and C3 are shared between XD1 and XD2, you want to see the rollup of XD1. To achieve this, we can apply rule to calculate as
['holder']=N:STET;
[]=N:
IF( !XD2 @=!XD1 ,
DB('XC1',!XD1,'holder',!Measure),
0);
Applying this role, the grid will look as below
No comments:
Post a Comment